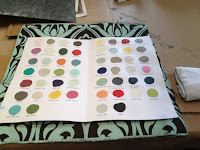
As a designer I often find myself in discussions with clients about their old furniture. They don't want to just give it away and they don't want to throw it out, so what can they do? The one way around this situation is to give an item a new life and a new look with the paintbrush. Amy Howard At Home One Step paint is designed for this type of application. It is easy to apply and has a built in primer so there is no need to apply a primer to the wood first, however, you do need to clean or degrease the furniture before applying the first coat, so that the paint can adhere to the surface. There may be a tendency to forgo this step but please don't. The Amy Howard At Home product line has an array of rich and heirloom like colors, waxes, gold and silver leaf option, sealers and also a lacquer spray paint option, so you may need to do some research before you start your project. It is up to you whether you want to apply a sealer. I applied a sealer to every item I painted. It hardens the surface, makes it easier to clean and can add a bit or a lot of shine depending on which sealer you choose.
When I'm learning how to work with a new product, I work on a small item that I can afford to mess up. In order to learn more about this paint I worked on a small piece of molding with lots of design details. When you have an ornate item to paint, you can apply a wax or a glaze to the item to add depth and enhance the detail. On a flat item there is no reason to add wax or a glaze because there is nothing you want to stand out or highlight. For this piece of molding I chose to use their Good Man is Hard To Find paint and after it dried I applied a liming wax to enhance the details.

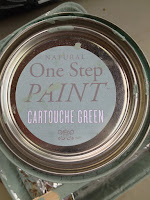
 My first project was a small coffee table that was on its way to Goodwill. Perfect. This was just what I was looking for. After degreasing the table I waited several hours so that the table would be dry for the first application of paint. First I dismantled the table because the ornate hardware would be hard to paint around. My first decision with this project was whether to paint the hardware or not to. It was an easy decision not to because painting the hardware makes it blend into the wood but this hardware was just too distinctive and added a richness to the look of the table that would be foolish to destroy. The paint used for this table was Cartouche Green.
 My last project using this paint line was a kitchen that was in dire need of an update. A some point in the future when the client's budget will allow for knocking out walls and resurfacing the floor, this kitchen will undergo a major remodel, but for now, it's Amy Howard's Ballet White and sealer to the rescue. The best way to do a kitchen is to remove all the cabinet doors and drawer fronts and take off the hardware from each one. After degreasing the old cabinets, you will probably need to do more than one coat of paint depending of course on what color you choose and how well it hides the old color. I ended up doing three coats to this kitchen's doors and drawer fronts. The wall and base boxes only took two coats. It took me about 2 weeks working about 8 hours a day, And it looked great when it was done. The white paint gave a fresh, updated look to the small kitchen.
I often work with clients who prefer to do much of the work themselves. I work with them offering the best product line that I know that will serve their needs. Since I have done this kitchen, I have advised two clients on the how-to of painting their kitchens. This is a monumental task so you do need to get advise before you embark on the journey. There are professional painters that will do this if you prefer someone else take up the brush.


No comments:
Post a Comment