Showing posts with label Kitchen Design. Show all posts

Wednesday, August 26, 2020

Countertops are Installed ---- Hooray


leathered granite 

Hooray, our countertops are in place.  It makes a huge difference in a kitchen when the countertops are down. The window frame on our main window is a wider than most frames. In order to incorporate that modern look we removed the top slab front on the kitchen sink cabinet so the installers could secure the undermount sink properly.  As you can tell the dish washer still has to be installed.
Avenza quarty


                                     The countertops look beautiful. The high polish of the Avenza quartz is offset perfectly with the muted look of the leathered steel gray granite.   I'm happy.                  

It took four men to carry the granite up to the 2nd floor.  It is a heavy stone.  I heard the last guy say, "Faster, Go faster."  They did not want to drop this stone.  Thank you,  Cosmos Marble and Granite Company for doing such an awesome job.  


Thursday, August 13, 2020

Points of Distinction - Measuring For Countertops

LT-2D3D Laser Templator

Last year I picked out the countertop materials for the condo kitchen. I chose gray steel granite in a leathered finish for the island and Avenza polished pental quartz for the perimeter areas. As you all know, it's been a crazy Covid 19 year, so things haven't progressed as they usually do. Last week, George from Cosmos Marble and Granite  came to measure and brought the laser equipment with him. Made my day.

One of the most fascinating tools for measuring countertops is the LT-2D3D Laser Templator.  If I was in the business of tile and stone installations, I would have this tool. It may be pricey, but it's very efficient and accurate - just follow the red dot that marks the digital data point. I jest, it is more complicated than that. However, once you master navigating the software, it is a superb tool.

For those who know me, you know I love tools. As a child I worked with my Dad repairing furniture for the neighbors and with my Mom in a commercial kitchen, both fields have lots of tools.  Later, as a computer programmer I spent 30 years coding applications and as a kitchen designer I love the 2D and 3D aspect of designing on a computer.  So, I was intently watching the functionality of this tool at work.

In the short time George was here, I realized you can draw on different planes with the tool, you can use different colors for different objects so you cut down on confusion, you can aim the laser at the center of the sink cutout and it will calculate the correct cutout, if measuring a wall you can center the laser on the screw of the electrical outlet to get the correct outlet into the drawing. If I was having a backsplash done, he could have used the tool to measure up the wall as well. Yep, it's a great time saver. And once the data is collected you have it on file in a computer format that you can email if requested.  I think he must have been using the tool for awhile because it didn't take him that long to measure.


Next post you'll see the countertops in place.  I can't wait. Stay tune.

Ready for the plotter

Thursday, September 12, 2019

Understanding Leathered Granite


.
The uniqueness of each piece and the sustainability of granite make it the most popular countertop among homeowners. In most of my kitchen remodels, I specify granite countertops.  Although porous, it wears well in a kitchen and adds a natural movement that can not be matched by any man made product such as quartz.  I love granite in all its finishes.  I've had polished granite in my own kitchen for at least 15 years.  It's a great material for a countertop because it is stain resistant as well as heat resistant.  It's very durable but you can chip it if you bang something heavy against it. I randomly put a sealer on my granite.  It takes about 5 minutes to do so.

My current project has base cabinets along two walls in the kitchen and an island.  The base cabinets that create the island are cobalt blue while the cabinets along the perimeter walls are a medium gray.  The idea behind this design is to give the island a more dramatic position within the kitchen space.  This distinction can be achieved by the manipulation of three elements: color, finish(texture), material.  In this design, I used all three.  

Leathered granite has a matte or non-reflective finish, so if you like the high-reflective sheen of a polished granite, the leathered look is not for you. The diamond-dipped brushes that graze the granite takes the shine away and makes the stone muted and more stain resistance because the process will close the pores. The process also adds an amazing texture to the stone that allows it to be rough and elegant at the same time. This texture element also makes the stone more slip resistant when wet. Fingerprints and water spots are also lost on the hardy surface of the leathered granite.

As much as I love the unique look of leathered granite, there are two drawbacks that you should be aware of:
1) The uneven nature of the stone can make it susceptible to damage if met with a sharp object.
2) It can be difficult to clean if crumbs and liquids accumulate on the surface.  This is why it is important to ask the fabricator what type of seal they put on the granite.  Keep in mind that polished granite will always be easier to clean than leathered granite.


For the cabinets along the perimeter walls I've chosen a polished quartz.  This will contrast nicely with the muted leather look on the island.  It's a quartz product so it is more susceptible to damage by hot pots/dishes on the surface.  Pictured on the right are two samples of the Avenza quartz.  On the left is a honed quartz sample so the sheen is muted, the sample next to it is the polished one that will be installed.


Sorry, the countertops are not installed yet so there is no picture to attach of the countertops in place, but after there are installed I will post the pictures.


Monday, August 19, 2019

The Touchless Faucet

A few years ago I had a client who had to replace her sink faucet with a touchless type because of a hand injury.  She loved her touchless faucet, so when I designed the kitchen area in my studio, I decided on a touchless faucet. They are a nice looking faucet and do well in today's modern, fast-paced kitchen.

Our granite coutertop has not yet been installed, so the undermount sink is sitting on a temporary surface as though it is a drop in sink. However, when the permanent tops are installed you will not see the rim of the sink as you do in this picture. Like all faucets the touchless usually comes with the choice of a single hole which is best for a clean looking granite installation or a 3 hole installation component.

Other than an injured hand there are several reasons this product is a good idea in the kitchen where efficiency is mandated and food preparation is the primary task:
  • Hands-Free Operation – When you use a touchless kitchen faucet you don’t have to touch anything to make the water start. This can be very helpful when your hands are dirty or when you’re holding something.
  • Controlled Water Flow –  If the sensor is accurate the motion sensor detects when objects are in front of it and stops the water when there aren’t any. 
  • Cleanliness -  You can take a dirty dish and start cleaning it without spreading grease onto the handle.
  • Pull-Down Spray Heads – These faucets all come with pull-down spray heads that allow you to wash larger dishes with ease.   However, many regular faucets also have this feature.
I've had the faucet for 2 weeks now, so I am still evaluating the sensor.  There are times it seems to miss the hand wave.  With a touchless faucet the most important element is the sensor.  It must be accurate especially if you have children in the kitchen.  You definitely don't want water going on and off in response to movement outsite its assumed range.

As of this writing, these are the three best touchless kitchen faucets: Moen Arbor, Delta 9178T-AR-DST,  and Kohler K-72218-VS.


Wednesday, March 15, 2017

A Sanctuary For the Human Spirit - Wharton Esherick Museum


Tucked away in the hillside around Paoli, Pa., The Wharton Esherick Museum is a treasure chest of  inspiring artistic masterpieces.  Wharton Esherick began his career as a artist and studied at the Academy of Fine Arts in Philadelphia. In was customary for artists to carve the frames for their oils so Esherick acquired a carving set and soon found himself fascinated with working with wood.  As Esherick became known for his carvings, sculptures and furniture, he became less involved with his painting career. This evolutionary process creates  a very inspirational journey when you tour this prolific artist's studio/residence that is now a museum.

The Studio began as the stone portion in 1926, the same year his last child, Peter, was born. In 1940 he constructed a two-story frame addition that included a dining room and a bedroom for Peter.  The spiral staircase pictured on the left was created to go from the dining room into the bedroom above.


Around 1965, he added the curved tower which he called the silo. Withn the silo he added a kitchen with a curved cherry countertop and a undermount copper sink with an indent for a cutting board. I found the whimsical nature of the hand carved utensils and a carved face as a pan handles an absolute delight.

As a kitchen designer there are two elements in the kitchen that really stood out.   In 2014 when I attended the Kitchen and Bath Industry Show in Vegas. Mick deGiuilio was there introducing his fabulous multi-tiered undermount stainless steel sink with grooves that allow for a cutting board or a utensil tray. Designers loved it for its versatility and its functionality. And they knew it would allow working in the kitchen to be less time consuming for their clients.  I had absolutely no idea that in 1965, Wharton Esherick had designed what I would consider the prototype to that sink. I looked at that copper sink with its insert and thought 'WOW".


The second eye-catcher was the base cabinet with a light in it.
Now, the light isn't up to our standards today for cabinet lighting, but in 1965 this was not something that was being done.  One of the most pronounced design features when  I was at the EuroCucina Design Show in Milan, a few years ago, was lighting in all drawers and base cabinets in the kitchen.  So again, Wharton was ahead of his time.

There is so much more I can say about this prolific artist. The museum is filled with beauty in sculpted forms - such as the Oblivian,  unique furniture, oil paintings, and hand relief carvings.  If you would like to book a tour please contact them via their website: http://whartonesherickmuseum.org/contact.html.

If you go, enjoy the journey.


Monday, January 18, 2016

The One Step - Amy Howard At Home Paint

 
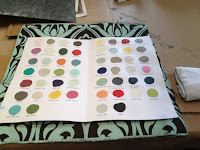
As a designer I often find myself in discussions with clients about their old furniture.  They don't want to just give it away and they don't want to throw it out, so what can they do?  The one way around this situation is to give an item a new life and a new look with the paintbrush.  Amy Howard At Home One Step paint is designed for this type of application.  It is easy to apply and has a built in primer so there is no need to apply a primer to the wood first, however, you do need to clean or degrease the furniture before applying the first coat, so that the paint can adhere to the surface. There may be a tendency to forgo this step but please don't.  The Amy Howard At Home product line has an array of  rich and heirloom like colors, waxes, gold and silver leaf option, sealers and also a lacquer spray paint option, so you may need to do some research before you start your project.  It is up to you whether you want to apply a sealer.  I applied a sealer to every item I painted.  It hardens the surface, makes it easier to clean and can add a bit or a lot of shine depending on which sealer you choose.


When I'm learning  how to work with a new product, I work on  a small item that I can afford to mess up.  In order to learn more about this paint I worked on a small piece of molding with lots of design details.  When you have an ornate item to paint, you can apply a wax or a glaze to the item to add depth and enhance the detail.  On a flat item there is no reason to add wax or a glaze because there is nothing you want to stand out or highlight.  For this piece of molding I chose to use their  Good Man is Hard To Find paint and after it dried I applied a liming wax to  enhance the details.
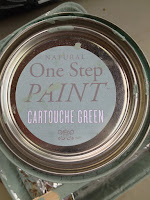
My first project was a small coffee table that was on its way to Goodwill.  Perfect. This was just what I was looking for.  After degreasing the table I waited several hours so that the table would be dry  for the first application of paint.    First I dismantled the table because the ornate hardware would be hard to paint around.  My first decision with this project was whether to paint the hardware or not to.  It was an easy decision not to because painting the hardware makes it blend into the wood but this hardware was just too distinctive and added a richness to the look of the table that would be foolish to destroy. The paint used for this table was Cartouche Green.


My last project using this paint line was a kitchen that was in dire need of an update.  A some point in the future when the client's budget will allow for knocking out walls and  resurfacing the floor, this kitchen will undergo a major remodel, but for now, it's  Amy Howard's Ballet White and sealer to the rescue.  The best way to do a kitchen is to remove all the cabinet doors and drawer fronts and take off the hardware from each  one.  After degreasing the old cabinets, you will probably need to do more than one coat of paint depending of course on what color you choose and how well it hides the old color.  I ended up doing three coats to this kitchen's doors and drawer fronts.  The wall and base boxes only took two coats.  It took me about 2 weeks working about 8 hours a day,  And it looked great when it was done.  The white paint gave a fresh, updated look to the small kitchen.


I often work with clients who prefer to do much of the work themselves.  I work with them offering the best product line that I know that will serve their needs.  Since I have done this kitchen, I have advised two clients on the how-to of painting their kitchens.  This is a monumental task so you do need to get advise before you embark on the journey.  There are professional painters that will do this if you prefer someone else take up the brush.  


Friday, February 20, 2015

The Urban Cultivator


When  the kids were young I spent hours in my vegetable garden after work and on the weekends, planting , harvesting then canning.  It would have been great to have a unit like the Urban Cultivator inside to handle the herbs and lettuces all year round.  Instead of buying a whole bunch of kale and throwing out half of it, with this unit you can just take out exactly the amount needed. Very nice.

The Urban Cultivator is an indoor garden appliance that can grow herbs, an assortment  of vegetables, and microgreens.  You have two styles to choose from: a stand alone unit or a built-in unit that fits in the same size area that a dishwasher would fit into.  The unit is plumbed into the water line in much the same way as the dishwasher is, so you don't need to worry about watering the plants.  It fits rather seamlessly into a kitchen design and you have a choice of glass color - clear, half or dark tone and frost. 

Four bins come with the residential unit.  After planting your seeds you then select the correct program.  Lighting and watering is automatic after that.  You will still need to know what plants require more water than others, so you can properly pair the plants up, much like you would in an outdoor garden.

For anyone with a business or a chef/cook that just needs more than the residential unit,  there is a much larger commercial unit.

Stand Alone Unit with butcher block top.

 Happy Gardening.


Wednesday, February 11, 2015

Contemporary Hardware of Distinction


Noveau style
 I tell all my clients that "hardware is jewelry" in the kitchen, but it's hard to find a fit when you have a slab door and don't want the bulk of a handle. While there are some beautiful knobs and pulls in oil rubbed bronze, brushed nickel, copper and a variety of other finishes, the sleek look of contemporary and modern is not always available. But at KBIS this year, I found a great hardware solution to this issue.  An American company out of Milwaukee, Wisconsin, Contemporary Pull, is making a very sophisticated, simple, unique and impressive pull that provides functionality along with a flush mount within the cabinet giving the cabinetry that clean-lined look that people love. Oh, I was so excited when I saw this product.


Color Choices
Eclipse style


This is an industrial grade aluminum metal and you have a choice of six colors: natural, ebony, bronze, Bordeaux, peacock and canary.  Plus the new colors for 2015: gold, modern grey and copper.  If you look at the canary pull in the side picture, you can see how the pull sits into a recess cut in the door where the pull is installed.


There are four style choices at the moment but the possibilities are far greater than that.  You can get the geometric design as a square hole, a round one or you can have interconnecting parts known as "Eclipse" on have the curved lines of the "Noveau" style.


My congratulations to Pamela and Steven the owners of Contemporary Pull for making such a great product. And I think Pamela designed a stunning piece of contemporary hardware.


One other sidebar to this post: this booth gave out the best chocolate at KBIS - Indulgence Chocolatiers.  So good.


Thursday, February 20, 2014

Design & Construction Week 2014 - Part Two - The Copper Craze


It was evident at the tradeshow this year that copper with its warm color tones is enjoying a resurgence in the building and design industry.  Copper is in its own class of excellence.  It can accent any style of décor: contemporary, traditional or transitional. Copper can be used as accessories to soften a modern setting, as wall panels to set the tone for a section of the room, as a focal point like the hood over the kitchen island, or just simply a hammered copper backsplash mixed with other materials. Sometimes homeowners want the color and look  of copper but not the maintenance. 


Rohl, who has offered high-end kitchen and bath products since 1983, displayed their eye-catching and award-winning stainless copper sink.  This handcrafted, stainless copper finish sink is constructed of  a 16" gauge commercial grade stainless steel and specifically designed for the high-end residential market.   It comes in either the single or double bowl  incorporating a  "quiet coat" insulation with  sound-deadening technology.   
The view below shows the thick coating for an undermount installation of the sink.  There's a radius edge around the bottom making it easier to clean while the sides have a very defined zero-edge.


This stainless copper finish sink  is great for homeowners who want that fabulous look of copper but not the maintenance. The copper color is achieved by fusing a thin layer of specialty metal to the surface.  It's very durable and can easily be cleaned with soap and water.  Because since there is not actually any copper used, the sink will not oxidize or patina over time.


Contemporary Look
Amerock, a hardware  company headquartered in Mooresville, North Carolina, continually creates new hardware designs and colors based on consumer trends and preferences.  This year their  new brushed copper pulls/ knobs took center stage.  Copper can be used in rustic settings or  it can add elegance and richness to a contemporary setting.


RangeCraft, the range hoods made to order, can help the designer create that perfect kitchen focal point.   Superior craftsmanship and handcrafted in the United States, this company offers the homeowner  a  wide variety of hammered /antique copper, brushed stainless steel and  the non directional stainless steel existing designs from which to select,  or the homeowner can have a uniquely designed hood using any material and any finish of their choosing.


Within the Elmwood Fine Cabinetry booth there was a fabulous glass with resin door that would be great in the kitchen as a refrigerator door.  It would be the focal point of the room at that point.  The picture on the left  is a
glimpse of the refrigerator door they were showing in the booth.  The door style is called Eclipse.  It is a polished Stainless Steel frame that looks like it has mitered corners but is actually all  one piece.  The insert in the frame is an architectural resin of your choice.  This copper colored one was the favored eye candy among the attendees in the booth when I was there.


There were many other elements like decorative tiles and fabrics that showed the desire to have the warmth and richness of copper present in as many rooms as possible  in your home.


Saturday, February 8, 2014

Design & Construction Week 2014 - Part One - Overview


More than 75,000 design/build professionals were expected to attend the Design and Construction Week in Las Vegas last week and I've no doubt that expectation was met.  The combination of KBIS (Kitchen and Bath Industry Show) and IBS (International Builders Show) offered more exhibitors for designers and trade professionals to see and to take advantage of the variety of learning opportunities the combined forces presented.  They built the Show, people came, and it did not disappoint.
The mega Show was divided into three large buildings; North Hall dedicated to KBIS, Central Hall to IBS and South Hall featured more of IBS and WCI (Window Covering Industry).  It's best to plan ahead as much as possible and yet always leave enough time for discovery.  The show constantly surprises.

As I made my way through the registration area, I entered the showroom floor at the Kohler Booth.  The Kohler business started with the plumbing industry that we associate as Kohler but today it is home to a variety of furniture and home decorative products such as Robern, Kallista and Ann Sacks Tile and Stone Inc., so I spent a lot of time in the Kohler section.


Kohler Kitchen and Bath products are endless.  I love the new Sensate - touchless kitchen faucet.  This is great for cooks with sauce on the hands and good for all the generations living under one roof.  It just takes a wave of your hand behind the spout to turn it on or off.  It's a pull down hose with a magnetic docking  system that locks the hose back into place.  The faucet comes with a two-function sprayhead: spray and steam.   

Kohler has some fabulous sinks as well.  This red enameled cast iron double sink is an eye catcher. Cast Iron can definitely live up to the daily beatings from pots and pans but it also comes with a life long warranty against chipping.  It comes in a wide range of shapes and you have a choice of 20 colors.


Since Kohler has Kallista under its wing you also see Mick deGiulio's fabulous stainless steel sinks here.  Fabricated with a 16 gauge sink for durability this multi tiered sink  is a real task master. There are a variety of  accessories such as the teak cutting board and a flatware  tray. 


A little known fact that people outside of the Midwest may not realize about  Kohler is that it is owner of  the American Club, a 5 star hotel resort in Kohler Wisconsin.  The Chefs of the American Club were looking for a better turtle candy and 100 batches later, the Kohler original recipe for their chocolates was born.  Like every office worker in America knows, chocolate always brings people back.  So, I was at this display everyday of the show.
On my first pass through the KBIS North Hall, I tried  to pick up the common themes or occurrences .  There were several things that popped up as I made my way through the  crowd:  Copper Craze,  Technology in the Kitchen. Mixed Materials and The Italian Influence.   

So much to see and hear in 3 days time.   What a whirlwind! 


Monday, January 6, 2014

When the Kitchen Becomes a School House

In an era when children are spending more time inside the home than they are outside, a kid-friendly kitchen is invaluable.  It's a playground for the mind as well as the spirit.  With each recipe you tackle  you can teach your child: math, reading, team work, nutrition, cleanliness, respect, timing, the art of conversation, etc.  The list goes on and on. Taught by you in the  comfort and convenience of your own kitchen.
 
There's no doubt that the tools of the culinary trade like knives and glass items are dangerous, so safety and cleanliness are paramount when kids are working in the kitchen.  It's a good idea to keep those sharp knives off the countertop and keep anything  glass out of  their reach.   As a child I often worked with my Mom in the commercial kitchen of a large high school where she was the Director of the School Cafeteria as well as their principle cook. There were about 4,000 students in the school,  so I did my share of mashing potatoes and snapping green beans. The concept of fast food was not a part of everyday lunches programs at the time.  There were lots of sharp instruments around so Mom undoubtedly kept an eye on me but in today's world we have plastic utensils.   Plastic (bowls, measuring cups, lettuce knives, etc.) works great for kids.
Designed by
As You Like It Designs
Countertops:  The standard countertop height of 36" can be tricky for kids but is accessible with a stool that has a built- in handle which  allows them to move it around the kitchen.  The better option would be a lower countertop height of 30" which is your standard table height.  Some homeowners resist this idea because they are concerned that it will be obsolete as the child matures but a lower countertop is also advantageous for shorter adults.  It allows your arms to be straight which adds upper body strength when you lean over to roll out the pie crust or open that bottle of wine.    As far as the countertop material goes there are many options:    Silestone, Corian, Laminates, even Granite as long as it is sealed properly and has a rounded top edge or a bullnose edge.   


Hardware: The variety of knobs and pulls for you to choose from for your cabinetry is endless.  There is only one which I've pictured here  that I've heard parents complain about in regard to small fingers getting caught and cleaning.  Getting baking dough out of this hardware is apparently not an easy task.   
 Cabinet Locks:  Locked cabinets are a pain for adults but cabinets that contain chemicals like the sink cabinet need to be restricted .  If possible it would be best to store such items in the garage or a utility room.

Specialty Kids Cabinet:  Kids from ages 1- 3 love to pull out cabinet contents and empty them onto the floor.  For your own peace of mind it's best to just have a base cabinet where their sippy cups, lunch boxes, storage containers and play items can be stored and the kids can easily get to.   Maybe have this cabinet in the kitchen island or as the end cabinet.  It should be out of  the traffic flow pattern if possible. 

Cooktop:   All children need to understand that fire is dangerous and to always be aware of their distance from the flame or the burners or the oven.  If you are remodeling your kitchen then an Induction Cooktop is a great choice.  The heat is retained in the pot, not on the surface of the cooktop.  So, a child or adult can touch the cooktop without fear of being burned.  But remember, the pot will be very hot. 

Faucets:    Young children have a hard time reaching the kitchen faucet yet they need to understand how important it is to wash your hands while working with food.  You don't want to scare them about germs but it's a lesson you can't overlook either.   There are many faucets that have water sensors so you don't have to actually turn it on just either touch it or put your hands under the spout.  It just makes it easier for the kids to wash their hands and for you too when you need to water on  but don't have a free hand to use.  This faucet is also good for any elderly individuals that you may have living with you. 


Fun Stuff:   Young children are in a constant discovery mode so they enjoy learning and they pick things up very quickly.  Things that help their enthusiasm are colors, shapes and specialty items like their own aprons to wear.  Cookie cutters of all shapes and sizes are  excellent.  They aren't just for cookies.  They can be used to make eating sandwiches more fun.  I mean,  wouldn't you rather eat a gingerbread man peanut butter sandwich than one with a crusty old edge to it?  This is where kids can teach adults a thing or two about life.  Another item that's great in the kitchen is a blackboard.  A somewhat vintage idea this can be a great teaching tool for math, reading and drawing.  It can be used for making list and then checking the item off after it is put into the batter or after the task has been completed.  Of course, you can always use an IPAD for this instead but it may get a little sticky.

These are just a few details that need to be considered when designing a kid-friendly kitchen.  There is so much more that could be said about appliances, flooring, hardware, utensils and there is a plethora of  fun items that make the whole experience a fabulous family affair.  And when the meal has been enjoyed make sure the kids help to clean up and hang up their aprons.  


Wednesday, November 27, 2013

Kitchen Island - The Harmonious Element in the Kitchen Design


Two Island Kitchen
Two Island Kitchen


The kitchen island is the most coveted component of a kitchen design. It is the number one requested feature in a kitchen remodel, bar none.  Unfortunately the size of your kitchen greatly impacts whether or not you can have an island. Galley kitchens and small kitchens lack the necessary space required for this design element.

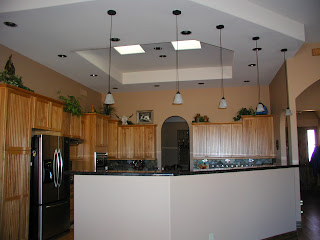
The biggest challenges to incorporating a kitchen island into the design are the location and the size of the island.  In order to have a workable design the island needs to fit into the kitchen; not disrupt the kitchen.  It can be any size and shape, however, traffic flow patterns and the overall structure of the kitchen space should dictate both the size of the island and where it can be situated to be the most effective for your family needs.  In the two island kitchen design pictured above my challenge was to situate the main island under the coffered ceiling.  This was a new construction home so putting in the plumbing and  the electrical would be done after my placement of the island.  All islands must have electrical outlets.

What cabinetry or appliances you want in the island depends on your needs and your budget. In this kitchen the main island housed the sink, dishwasher and trash compactor as well as  drawer base cabinets.   The second island had a vegetable sink, cookie tray cabinet and cabinets with accessories like a cutting board and spice racks and a cookbook shelf.  Cabinets choices will depend on what you want to do at that island.  Regarding space around the island, in general plan  on 42" to 48" on any side that faces another appliance such as the oven or dishwasher where a opened door can infringe on the space.  On other sides at least 36" is recommended.


Homeowners love islands for three main reasons:  storage, work space, sociability.   In other words, you get a lot of bang for your buck when you can incorporate and island into your kitchen remodel.

Storage:

Six large drawers
A designer will work with you to figure out the cabinetry layout in  your island.  This requires some thought because this is a very versatile space.  Take some time to think about the purpose of your island: prep space, cooking area, clean up space, eating space.  Different purposes require different cabinetry.  If it's a cooking island you will need a spice area, pot/pans, etc.  If it's for clean up then you need drawers for dish towels close at hand, etc.  Popular items in the island: Trash/recycle cabinet, small or large sink, dishwasher if it houses your main sink, pots/pans drawers, microwave, undercounter beverage/wine refrigerator, drawer base cabinet, tray cabinet.  Every island is different because the kitchen space and the needs of the client are different.

Work Space:
Although we all like as much work space as possible, you need to keep in mind the size of the kitchen and the scale of the island within that kitchen.  The island can not impede the cook's task  in any way.  Kitchens are family rooms but they are designed chiefly for the cook.  If you have a sink or cooktop in your island then you should have ample room on both sides of the feature to work.  

Sociability:
An island in the kitchen is a big magnet.  It's the gathering place when you have a big party, a few guest or just the family at home.  The biggest advantage of an island is that it allows the cook to be part of the conversations. It separates and includes the cook at the same time as long as the island is placed correctly within the space.  Another big factor in the sociability aspect of this harmonious element is that it often is used to delineate in large spaces or open floor plans by bringing the kitchen into its adjoining room without any confusion.  You can have your living room or dining room on one side of the island and the kitchen on the other.


.